Hi creative friends and Happy New Year!
It's Tarrah back today to share a new scrapbook layout created for Cocoa Vanilla Studio featuring the gorgeous Merry and Bright collection!
I just love creating Christmas layouts, what about you? I still have lots of the Merry and Bright collection and I also love to stash bust so I really enjoyed creating this layout!
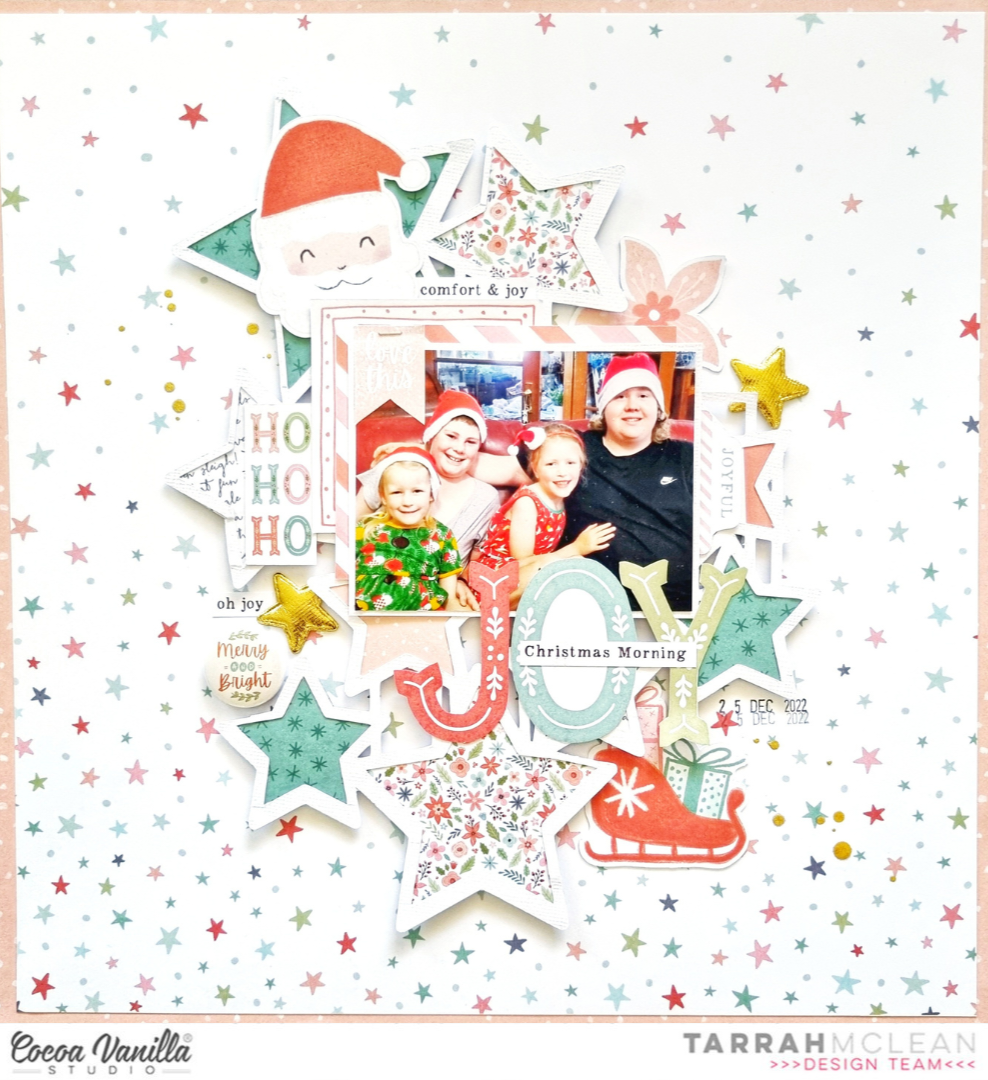
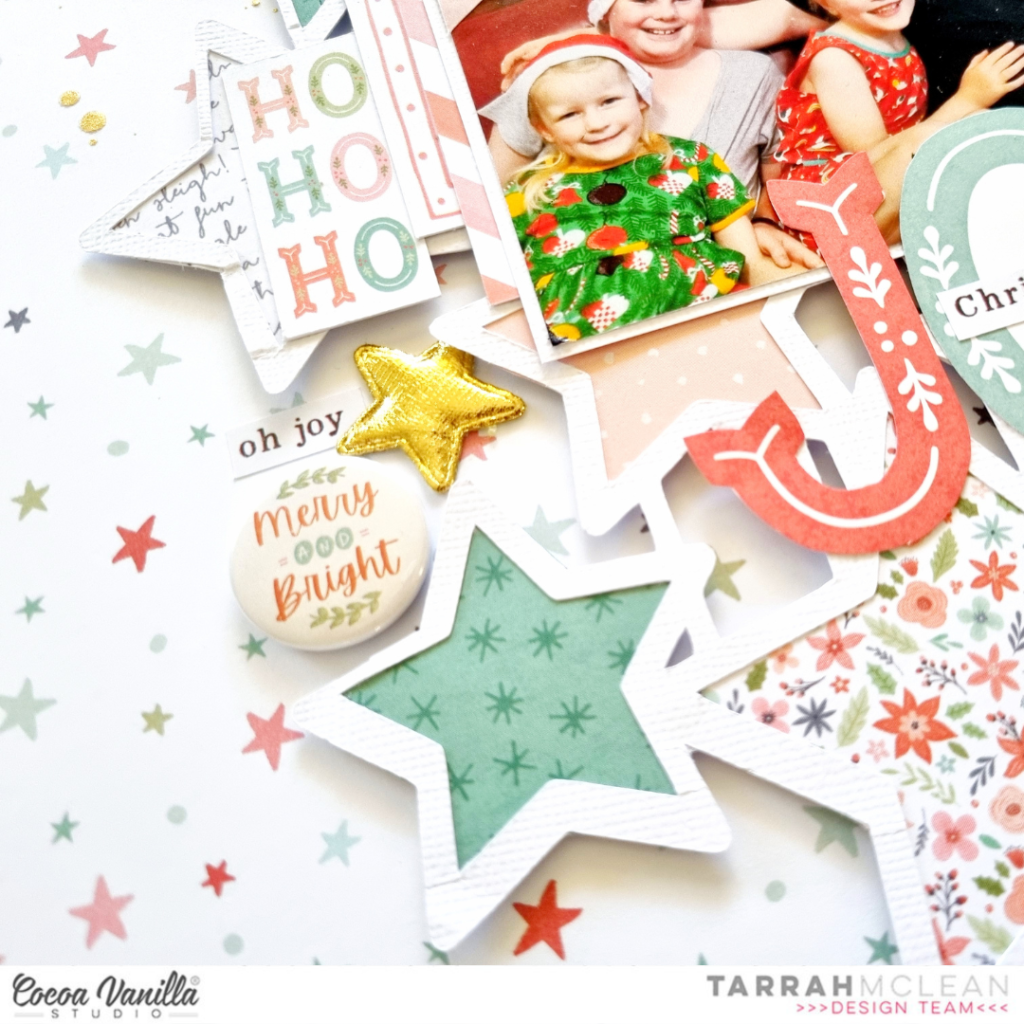
I started by choosing my background paper - opting for the Star Bright paper. I then cut out a cut file from white cardstock. The cut file is from CUT to YOU and is called Stars Squared. Once the cut file was cut out, I struggled with the placement and design of my page so I cut up the cut file into separate pieces so I could place pieces of it where I wanted to. Do you ever do this? I do this a lot if I am struggling to like how a cut file looks on my page. There are no rules to say you have to use a cut file the way it was intended!
I backed all the stars of the cut file with papers from the Merry and Bright A5 paper stack, once it was all backed, I then placed foam adhesive to the underside of the cut file and adhered the cut file to the 'Star Bright' paper.
![]() The photo I am documenting today was taken just this last Christmas of my 2 sons and my 2 beautiful nieces! My nieces were able to be here from England for this Christmas! It was wonderful to have them and it was the first Christmas we have had together with them! A very special memory to document. I layered one of the pocket cards and a cardstock frame from the ephemera pack under the photo and adhered it overlapping the cut file, in the centre of my layout. I also stapled a banner sticker from the accessory sticker sheet to the top left corner of the photo. My title is made up of a phrase sticker from the accessory sticker sheet overlapping the word 'Joy' fussy cut out from the Season's Greeting paper. It certainly was Christmas Morning Joy in our household!
The photo I am documenting today was taken just this last Christmas of my 2 sons and my 2 beautiful nieces! My nieces were able to be here from England for this Christmas! It was wonderful to have them and it was the first Christmas we have had together with them! A very special memory to document. I layered one of the pocket cards and a cardstock frame from the ephemera pack under the photo and adhered it overlapping the cut file, in the centre of my layout. I also stapled a banner sticker from the accessory sticker sheet to the top left corner of the photo. My title is made up of a phrase sticker from the accessory sticker sheet overlapping the word 'Joy' fussy cut out from the Season's Greeting paper. It certainly was Christmas Morning Joy in our household!
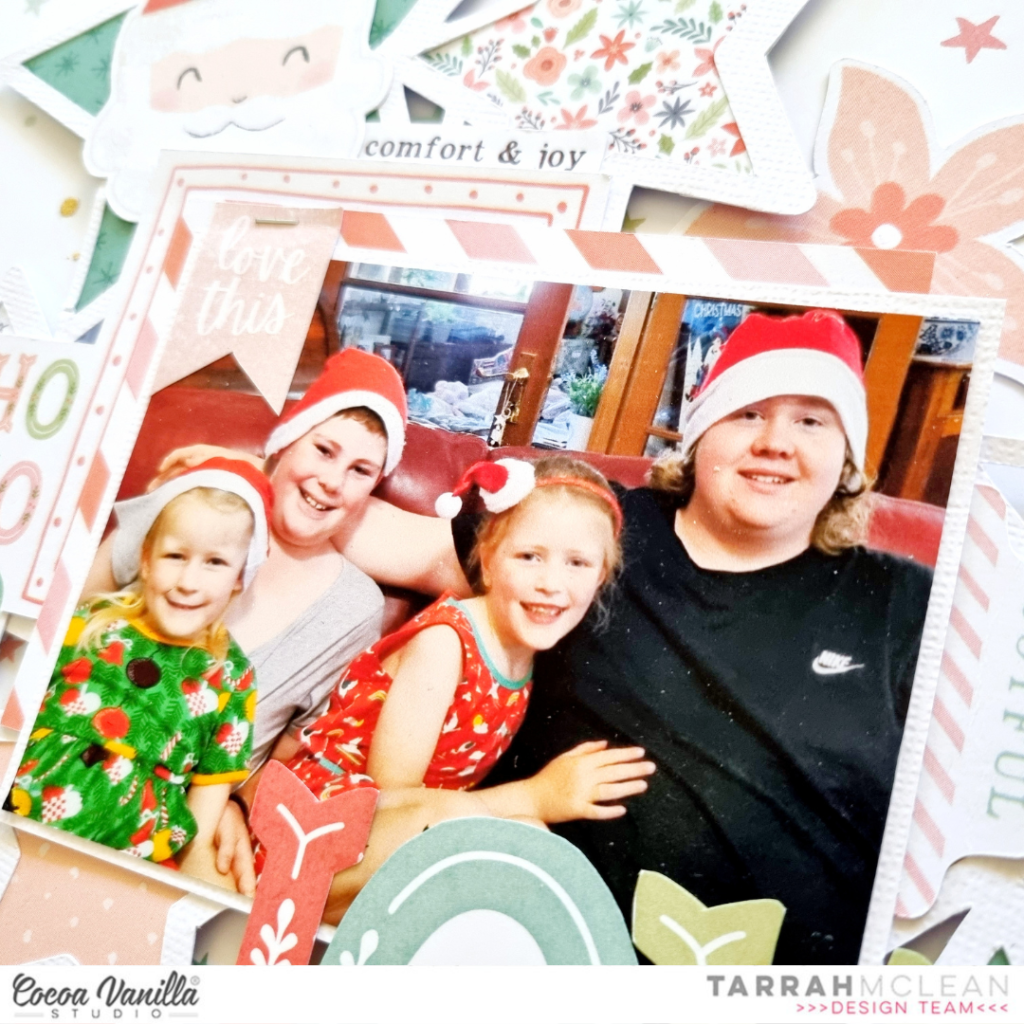
To the left of the photo I also placed the Ho Ho Ho die-cut from the ephemera pack, a gorgeous flair button, a phrase sticker and a gold puffy star. In the top left I also placed that super cute Santa face die-cut from the ephemera pack and to balance that with the bottom right corner, I placed the sleigh, also from the ephemera pack.
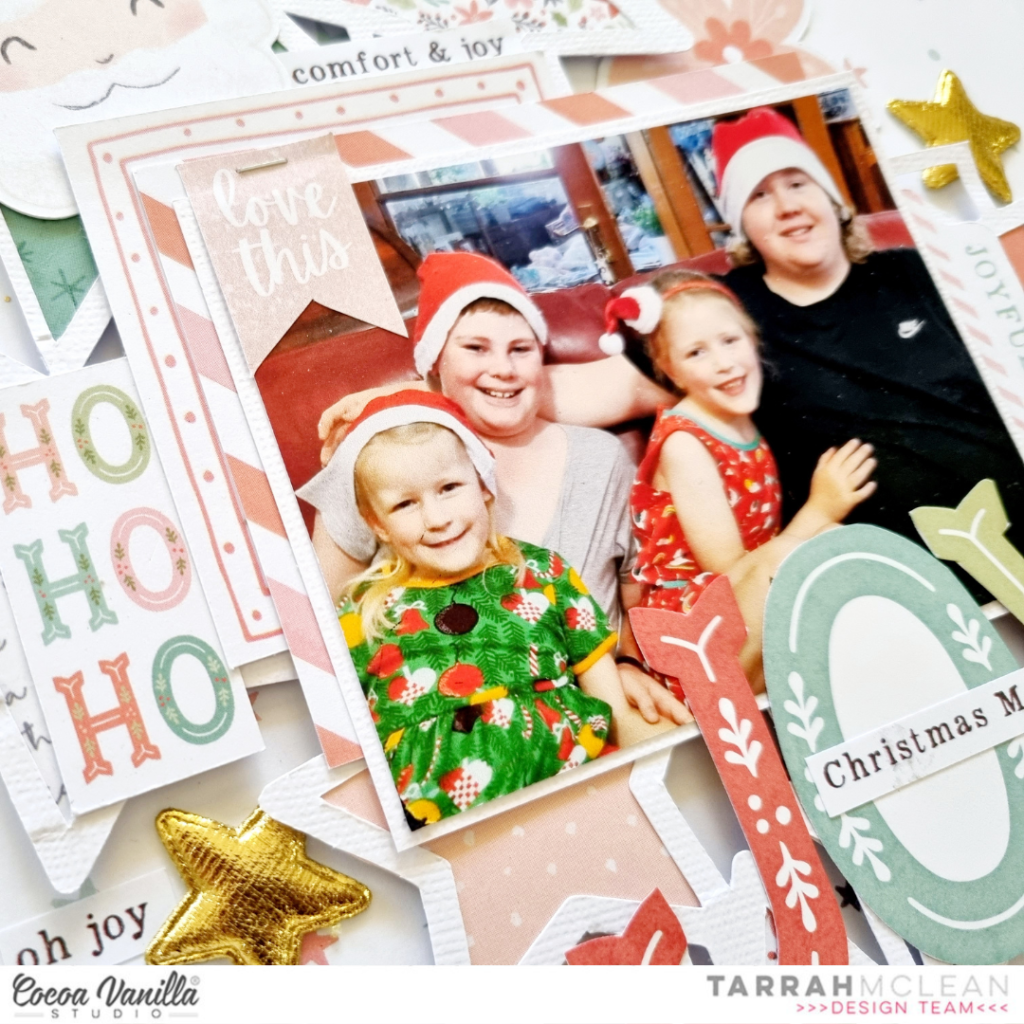
To finish my layout, I added a few smaller embellishments like small die-cuts, stickers, another gold puffy star and completely finished the page with stamping the date stamp and sprinkling some gold Heidi shine. Once I had finished my layout, I then auditioned some papers to go behind the Star Bright one to act as a 'frame'. I decided on the 'B' side of the 'Joy to the World' paper. I trimmed down the 'Star Bright' paper and adhered it to the 'Joy to the World' paper.

Thank you so much for stopping by my blog today! I hope you enjoyed reading about how I created my layout as much as I enjoyed creating it.
Do you have the Merry & Bright collection? I encourage you to pull it out and create some pretty things with it!
Tarrah x

No comments:
Post a Comment