Hi creative friends!
It's Tarrah back with you and today I am sharing another layout created for Cocoa Vanilla Studio featuring the stunning new Storyteller collection! This collection is absolutely gorgeous and so versatile for any themed projects and layouts you want to document your memories.
For my layout today, I am documenting a photo of my Mum and myself from a recent lunch out together.
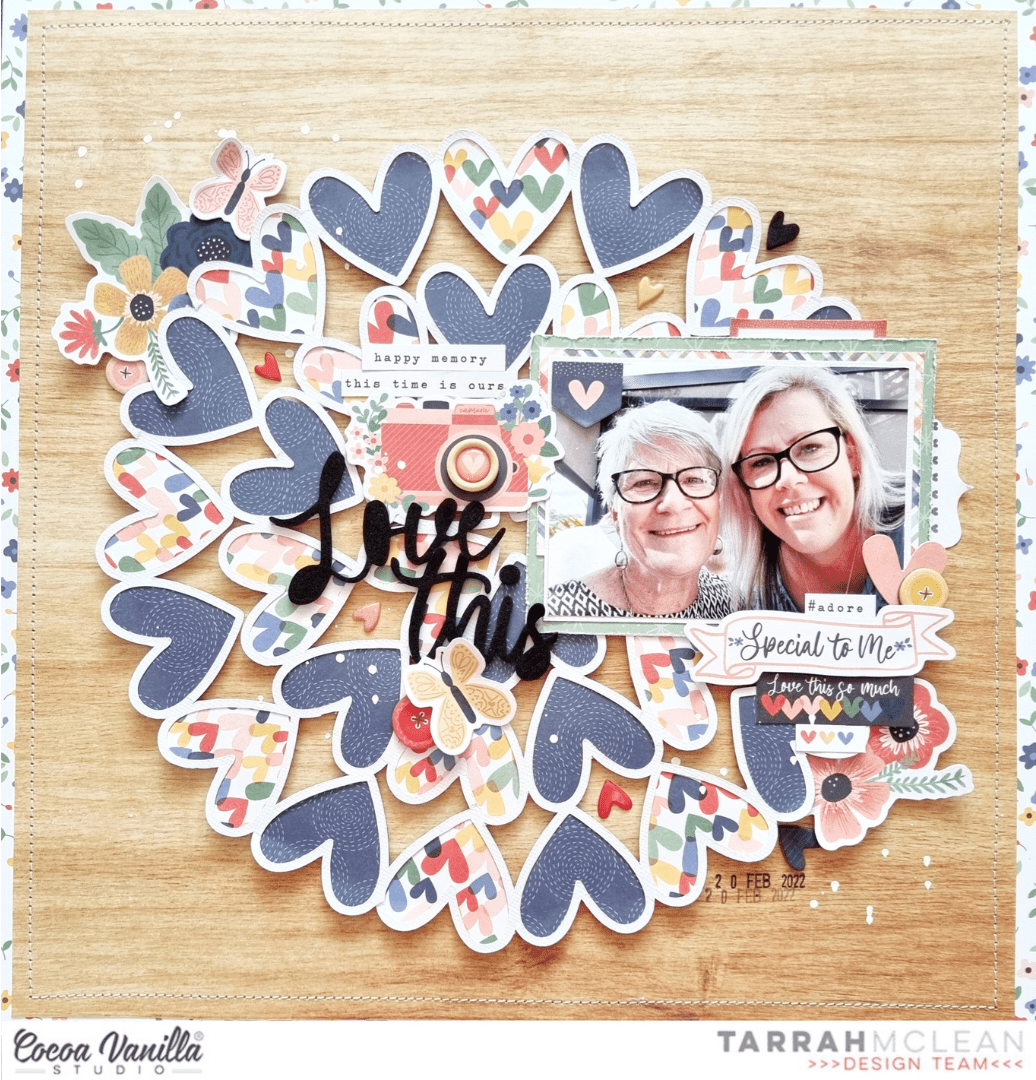
I started by cutting out a free cut file design from Paper Issues from white cardstock and then got busy backing the hearts in the cut file with the beautiful heart and navy papers from the A5 paper stack. Once the cut file was all backed, I added craft foam underneath the cut file and adhered it to the centre of the gorgeous 12' x 12' wood grain patterned paper. I love the shadows and dimension this adds to my layout. I did trim down the wood grain paper a little bit and matted it with the 12' x 12' small floral paper. I machine stitched a border around the edge using my sewing machine with white thread.

I decided to place my photo over towards the right of the page so as not to cover up too much of the hearts in the cut file design. I chose 2 more of the papers from the A5 paper stack and trimmed them to layer under my photo. I also slightly distressed the edges of the papers, I like how this adds a little more interest and texture to my layout. I also added one of the small banner stickers from the Accessory Sticker sheet to the top left corner of my photo. I also tucked in one of the tab stickers above the photo too. I created a cluster of embellishments in the bottom right corner of the photo and could not go past the 'Special To Me' banner piece from the ephemera pack. I added foam tape under this piece and placed it under my photo. I also added a chipboard button, heart and floral die-cuts and a couple of stickers here as well.

To the left of my photo, I added the cute camera die-cut from the ephemera pack and placed one of the gorgeous wood epoxy buttons on top. Above the camera I also added some of the phrase and word stickers from the Accessory Sticker Sheet. Below the camera die-cut I added my title which is made up of the foam title stickers. Below the title I added a die-cut butterfly and another chipboard button. You will notice in between the hearts in the cut file that I added some of the super cute enamel hearts randomly. This was mainly to enhance the heart design of the page. I love how this looks.

In the top left corner I added another cluster of embellishments here also, this cluster consists of one of the gorgeous floral die-cuts, a chipboard button and a butterfly die-cut. I added this cluster to help balance out the cluster I added in the bottom right area of the page. This helps with the flow of the page and draws the viewers eye in. With almost all of my pages, I start out adding all of the largest elements like my photo, the title and any larger embellishments. I then move to adding some smaller embellishments and then the smaller things to finish off the page. Once I had finished embellishing my page, I added some sprinkles of white mist and stamped the date stamp as well.

Thank you so much for stopping by my blog today! I had so much fun creating this layout, I hope you enjoyed reading how I created it. Make sure to ask your retail store for the gorgeous Storyteller collection...you absolutely NEED this in your life!
Happy creating!
Tarrah x

No comments:
Post a Comment