Hi creative friends!
It's Tarrah back with you and today I am sharing a new layout created for Cocoa Vanilla Studio featuring the gorgeous Happy Days collection!
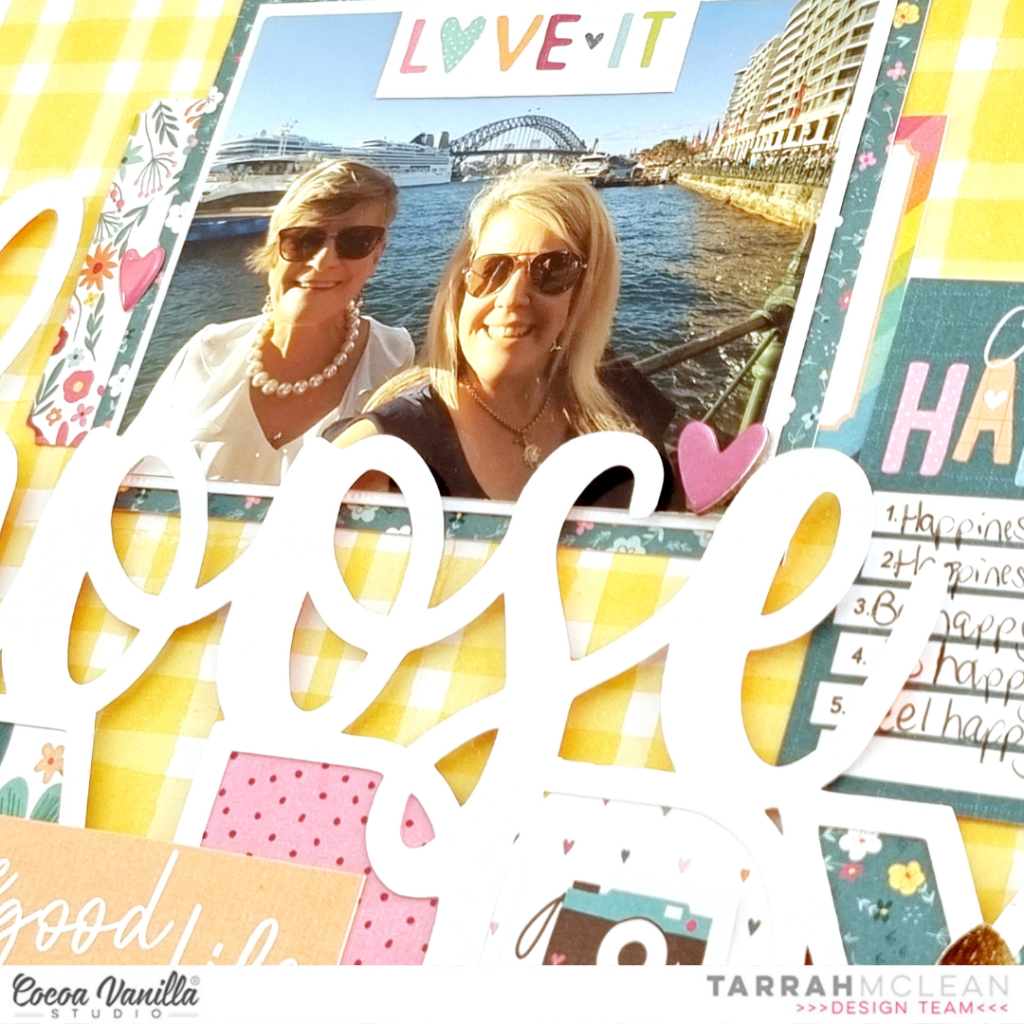
For this project I was given the assignment of using patterned paper for my background and chose the 'B' side of the 'Feel Good patterned paper' to document a photo of my Mum and I taken a few years ago.

I chose a title cut file from CUT to YOU to add to my layout, cutting it from white cardstock. I then backed the open letters in the word 'Happy' with various papers from the A5 paper stack. I added craft foam to the underneath of the cut file and then adhered it to the background. I love how the white cardstock is a big contrast to the yellow background, this really helps the elements pop off the yellow patterned paper. I made sure to only use a small amount of adhesive so that things could be tucked underneath the cut file.
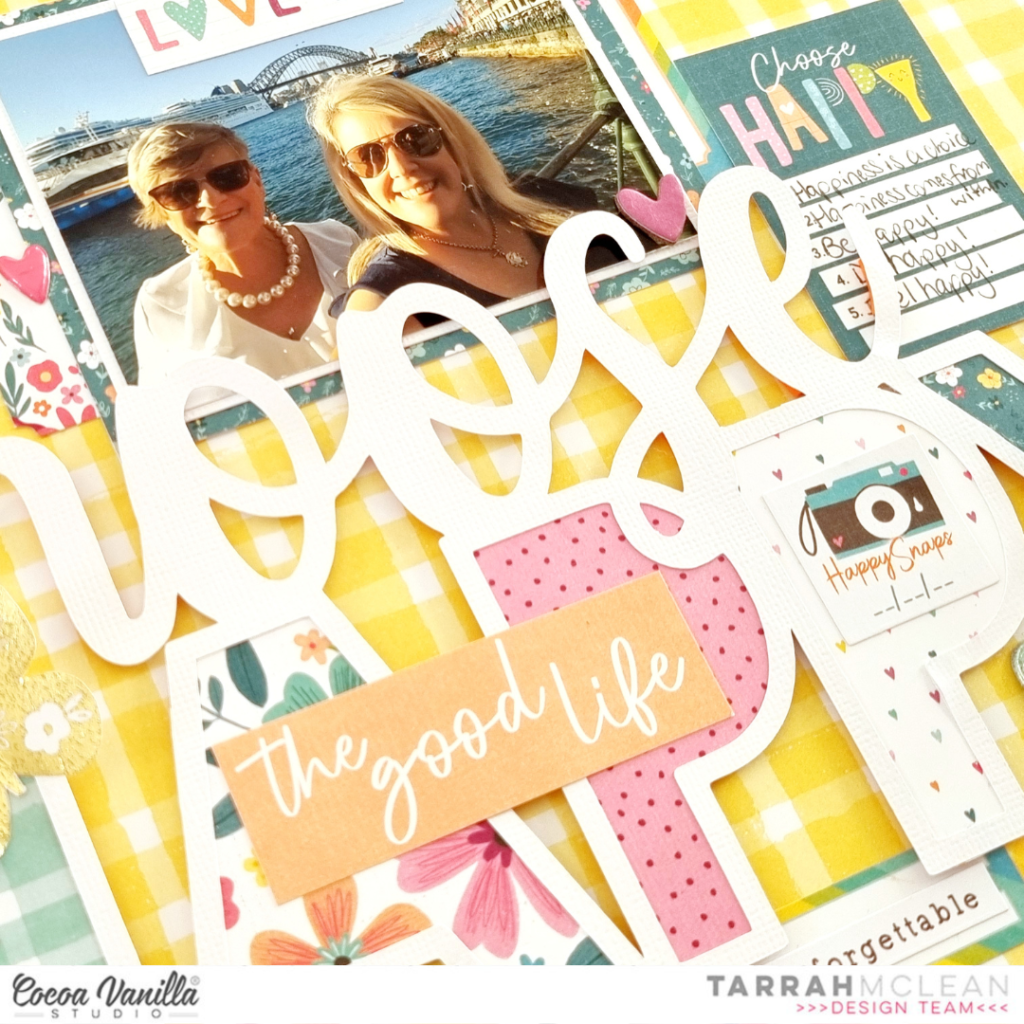
Above the cut file I tucked in my photo, I first layered one of the papers from the A5 paper stack under the photo, I also tucked in two of the stickers from the Accessory Sticker Sheet and tucked them in either side of the photo. I cut out some phrases from another sheet of the 'Feel Good patterned paper' and adhered one on top of the photo and the other on top of the cut file. I love to layer embellishments on top of cut files to add some more interest.

At the bottom of the cut file, I adhered the long paper strip with the tabs on it to also from the Feel Good patterned paper, I love how that looks like the cut file is sitting on a shelf of sorts. This was a great opportunity to add some of the small phrase stickers from the Accessory Sticker Sheet to the strip. I cut out the Choose Happy journal card also from the Feel Good paper and adhered it to the right of the photo, I then added some quotes about being happy to it.
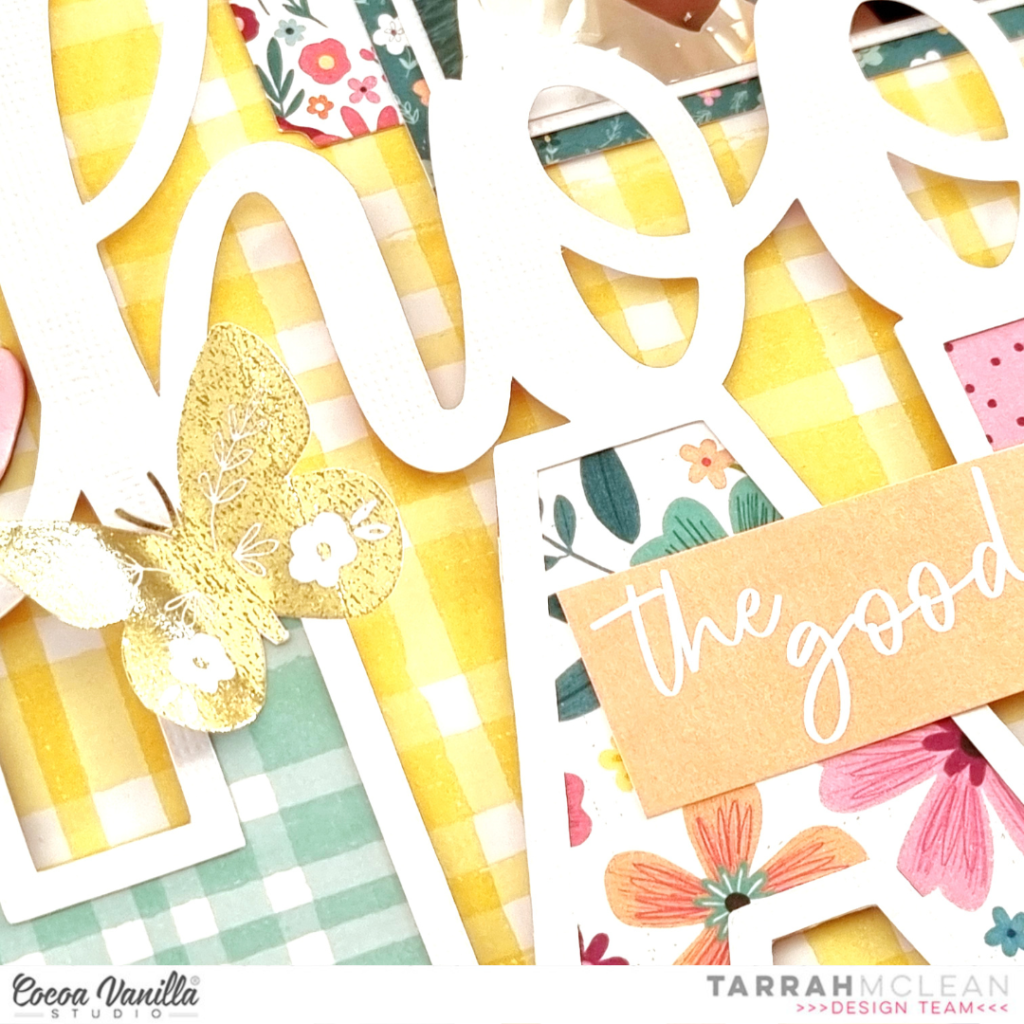
Some of the smaller embellishments I added to my page are the Chipboard hearts, the gold foil butterflies cut out of the specialty paper, puffy hearts, ephemera, enamel hearts and some more accessory stickers. I love the dimension that my layout has and I love how it turned out too. Lastly I stamped the date stamp as I always do on my layouts. Don't be afraid to use a busy patterned paper as your starting point for your page, you can still keep the focus on the photo by using clever techniques to draw your eye to the photo.
Thank you so much for stopping by my blog today! I hope you enjoyed reading about how I created my layout as much as I enjoyed creating it!
Happy creating!
Tarrah x
No comments:
Post a Comment