Hi creative friends!
It's Tarrah back with you and today I am sharing another new scrapbook layout created for Cocoa Vanilla Studio featuring the stunning Storyteller collection!
I have had this lovely photo of my parents printed for ages, I was finally able to document it using the Storyteller collection because look how the colours in the photo match perfectly with the colours in the collection?!
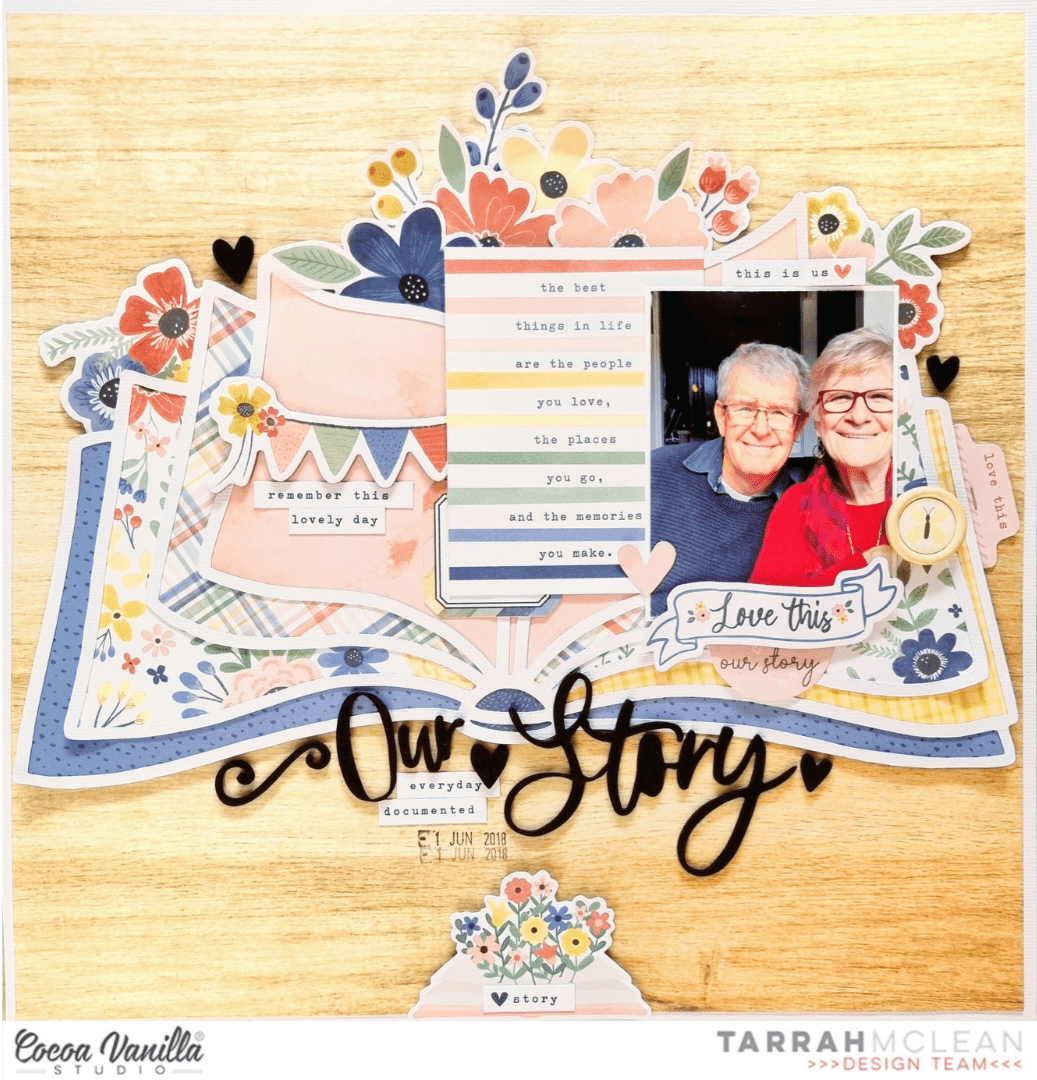
I chose the gorgeous woodgrain side of the Cross It Off paper as my main background paper, trimming this down and adhering it to a plain sheet of white cardstock. I decided to cut out a gorgeous book cut file from CUT to YOU from white cardstock using my Silhouette Cameo machine. I chose a variety of the papers from the A5 paper stack and backed them behind the cut file. Once the cut file was backed, I added some craft foam to the underneath and adhered it down on the woodgrain background paper. The reason I do this is so it creates dimension, shadows and texture. Once it was adhered to the background, I bent the edges of the 'pages' to make it look a little more realistic and to add even more dimension.

I adhered the photo to the right side of the cut file and tucked in one the pocket cards on the left side of the photo. Under the bottom left corner I took one of the accessory stickers and placed it down. Further left of the pocket card, I took one of the banner chipboard pieces and adhered this down. Around my photo I added a few different embellishments including at the bottom of the photo, I added the 'Love This' ephemera piece using craft foam and tucked the half circle Our Story ephemera piece below it. To the right of the photo I added one of the super cute wood epoxy buttons and a small heart die-cut between the photo and the pocket card. Above the photo and below the chipboard banner I added some phrase stickers from the accessory sticker sheet to help tell the story.

The title for my layout is 'Our Story' made up from the gorgeous black foam title stickers. I placed this at the bottom of the cut file and love how it looks there. I also placed the swirl and a heart from the same pack here too. As I had the black at the bottom of the page, I wanted to create a visual triangle and did this by adding 2 more hearts in 2 different places on my layout to draw your eye around the page. Creating a visual triangle is important when designing and for the finished result as it becomes pleasing to the viewer. With my layout all of the colour going on in it, the visual triangle with the solid black elements helps to break up some of the colour. Under the title, I took more of the phrase stickers from the accessory sticker sheet and placed them down.

At the top of the book cut file, I knew I wanted to tuck in quite a few of the stunning florals from the floral ephemera pack. I played around with a few of them for a little while until I as happy with how it looked, I bent the edges of the petals and leaves also. In either corner of the book cut file, I took 2 of the floral chipboard pieces and tucked these in how I liked them. After the florals were added to the top, I felt like the very bottom of the page was a little bare so I took the floral book chipboard and placed it in the centre at the bottom of the page. I love how that added a little something to the page. I also placed a phrase sticker from the accessory sticker sheet on top of it. Lastly I stapled the 'Love This' tab on the right of the cut file and stamped the date stamp below the title.

Thank you so much for stopping by my blog today! I hope you enjoyed seeing and reading about how I created my layout as much as I enjoyed creating it?!
Haven't got yourself the beautiful new Storyteller collection yet? Make sure you keep an eye out in the Cocoa Vanilla online store for its arrival soon!
Happy creating!
Tarrah x
No comments:
Post a Comment